

Baking macarons brings me back to college days, when I first started learning how to bake, a schoolmate generously shared her knowledge and taught me all I knew about macarons. Those were fun times! Years of making these and it never gets old – they are fun to make, a great medium for any flavour, and a massive crowd pleaser. It might seem challenging and intimidating, but trust me when I say it gets easier with practice! There are many ways to make macarons but I personally prefer the Italian meringue method and it rarely fails me even with the insane humidity in Singapore.
If it’s your first time, you can easily fill them with jam or Nutella, or go the extra step to impress and make this super easy, 2-ingredients only Chocolate Ganache.
Foolproof Macaron Recipe (Italian Meringue Method)
A foolproof way to make macarons via the Italian meringue method (adapted from Pierre Hermé). This step-by-step, detailed recipe will help you make these little cookies that can be filled with a variety of fillings!
1 batch makes ~72 macaron shells.

Ingredients
Large Mixing Bowl
Stand Mixer Bowl
Saucepan
Instructions
-
Large mixing bowl: Sift almond flour and icing sugar into a large bowl. Add in the 55g of egg whites (no need to stir). Set aside.
-
Stand mixer bowl: Add 55g of egg whites into your stand mixer bowl. Set aside.
-
Saucepan: Add water and sugar, and bring to a boil ~118˚C. When the syrup reaches 115˚C, turn on your stand mixer and beat egg whites to soft peaks
-
When the sugar mixture in saucepan reaches 118˚C, take it off the heat and stream it into the egg whites (while still mixing). Mix to form a meringue until it's cool enough to touch (about medium to stiff peaks).

-
Add the meringue mixture into the large mixing bowl containing almond flour mixture and fold. If desired, add in gel food coloring.

-
Preheat oven to 160˚C, line baking trays with parchment paper, prepare a piping bag attached with a round tip. Fill piping bag with macaron batter.
-
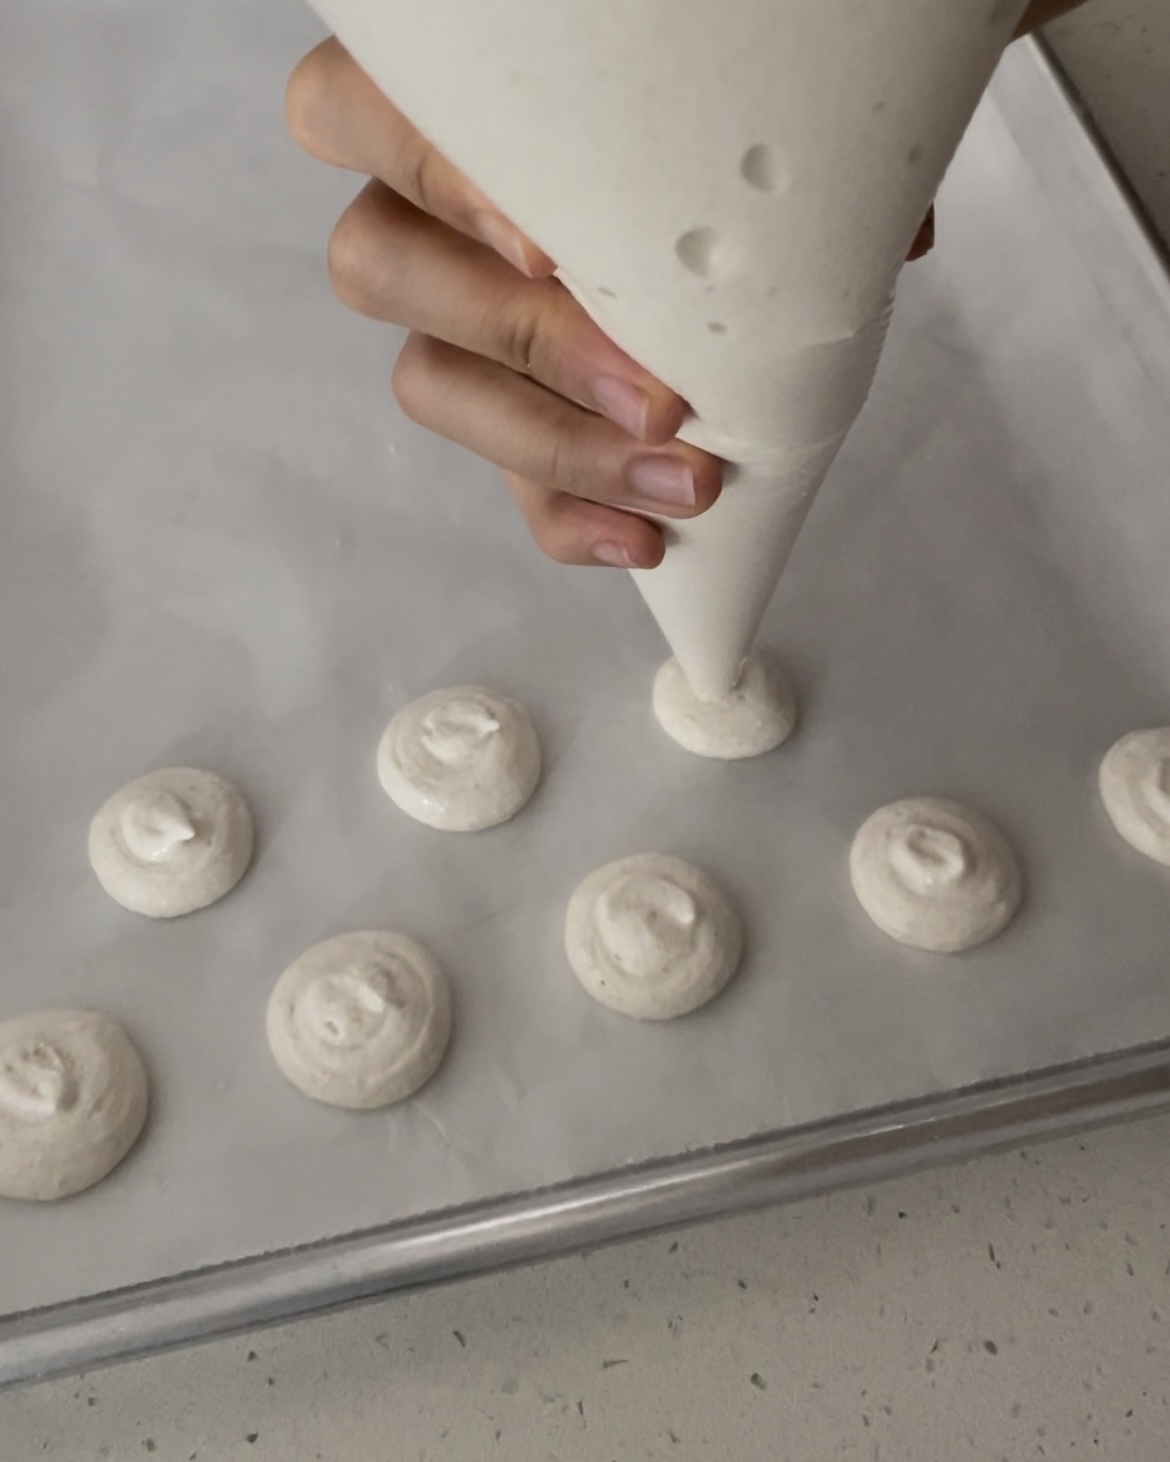
Pipe the shells to the size you want, leaving sufficient space in between them. Let shells rest for ~15 minutes in a cool, dry room.
-
Bake for ~11 minutes until shells can be easily removed from parchment paper without breaking. Let cool completely.
-
Pair the shells and fill with any filling of your choice! Store in fridge for a day to allow flavours to develop, serve chilled.

Note
Ingredients
- Almond flour is easily found in supermarkets or Phoon Huat (I usually get the superfine version).
- Sift your almond flour and icing sugar for consistency in a smoother macaron shell surface. You don't need a sieve with very small holes as it will take forever to sift, something with larger holes just to avoid clumps will suffice.
- Some recipes (including Pierre Herme's) suggest aging egg whites - i.e. leaving egg whites in the fridge for a couple of days after separating the yolk to increase the egg whites' elasticity for a less runny batter. I've almost never planned ahead enough to have aged my egg whites and my macarons still turn out fine, it's up to you!
- The recipe is scalable, so if you have too much e.g. egg whites and don't want to waste them, just vary the recipe ratios accordingly.
- If you want to colour your macaron shells, use gel food colouring and NOT liquid food colouring as the latter will negatively affect the consistency of the batter.
Equipment
- Mixer: Use a stand mixer if you have one so you can easily move between tasks while the meringue is whipping. Use a clean glass or metal bowl to beat the egg whites (plastic tends to trap oil/fat which sometimes cause egg whites to not whip properly)
- Thermometer: It's recommended to use a candy thermometer to measure sugar mixture temperature. If you don't own one, you can try eyeballing: once the sugar mixture starts bubbling lightly, start beating the egg whites (on high speed), until soft peaks form. Keep an eye on the sugar, once the entire sugar mixture surface is filled with small bubbles, stream the sugar mixture into the egg whites while mixing.
- Piping bags: I use regular piping bag with a round tip attached. If you have neither, use a ziploc bag and snip off one side.
- Parchment Paper vs Silicon Mat: I prefer parchment paper over silicon mats as that is what I readily have at home.
Preparing Batter
- To fold meringue into almond flour mixture: Imagine the bowl as a clock. Starting from 12 o'clock, use your spatula to scrape the sides of the bowl clockwise, ending at the same position. Scrape contents from 12 o'clock to 6 o'clock. Repeat.
- The macaron batter is ready when it's consistency is like "lava". It should flow off your spatula slowly and easily, but should not be too runny. If it's your first time and unsure, be conservative with the folding and do a test: pipe a few samples and wait for a few minutes. If the shells still have little bumps and surface is not smooth, it means the batter was undermixed. Continue folding and testing, the macaron batter is ready when any 'bumps' smoothen out after resting. Be careful not to overmix as the macaron batter will be too runny and spread out too much.
Piping Macaron Shells
- Optional but for consistency, print out a macaron template and place your parchment paper over it so you have a guide to follow while piping.
- I like to let my piping bag sit in a tall cup and spoon the batter in, I find it much easier and reduces mess.
- To pipe: hold the piping bag at a 90˚ angle perpendicular and close to the surface of the sheet. Squeeze with consistent force without moving the piping bag until the desired circle size. Release force and lift the piping bag upwards. If the macaron batter is the right consistency, any "bumps" will slowly disappear, forming a smooth surface.
Resting Macarons
- Resting macarons are important to ensure a skin forms and the macarons rise when baking, creating their iconic 'feet'.
- If you are in a warm, humid country like Singapore, turn the A/C on and let the macaron shells rest the cool, dry room. It usually takes about 15 minutes and it's ready when the skin turns dull, and you can lightly touch it without sticking. I have tried resting without A/C and it still works, but with less success on rainy days.
Baking
- Bake at 160˚C for about 11 minutes. To determine if macarons are ready, try moving one of the shells on the parchment paper. If the entire sheet of paper moves with the shell (and it doesn't wobble on the spot), it's ready.
- Are your macarons browning too much? I find that putting a baking tray at the top of the oven blocks the heat source and helps prevent over-browning of the tops.
Cooling and Storage
- Sometimes when the shells cool too quickly, the inside collapses, causing hollow macarons. It seldom happens to me, but I read a trick to reduce the chances of this happening - let your macaron shells cool upside down.
- Macaron shells freeze nicely. You can keep them up to a few months, so you can bake in advance for a few weeks! Let it defrost slowly in the refrigerator, or at room temperature for about half an hour.
- Fill your macarons and let them sit in the fridge for about a day to let the shells absorb the flavor before serving. They are best served 10-15 mins out of the fridge. (They're usually too hard fresh out of the refrigerator)
- If you're just starting out and are looking for an easy filling, fill your macarons with Nutella or jam! Avoid fillings with high water content as the shells will absorb and turn mushy over time. Another easy filling would be Chocolate Ganache.